Pressure Cooker Jam: Proven Techniques Guide
By Lina Ortega • 19th Feb
Fruit preserve pressure cooking and jam making pressure cooker methods offer a legitimate shortcut, cutting stovetop cooking from 45 minutes to under 30 minutes total, including preheat and release time. But only if you know which technique matches your setup, how long it actually takes, and whether you'll truly use the result more than once.[2][3][4]
After watching a friend's fancy multicooker fail three weeks past warranty, gasket cracking under her second jam batch, I did the math on replacement parts versus starting over. The pressure cooker jam method itself isn't the issue; it's knowing what actually works, what's repeatable, and what leaves you with jars of jam, not regret.
Why Pressure Cooking Transforms Jam-Making
Pressure cooking softens fruit and extracts pectin far faster than stovetop simmering, which is the whole appeal.[8] If you're new to pressure cookers, start with our Pressure Cooker Basics for safe first-time setup. The method collapses cooking stages: you build flavor and texture under pressure, then finish on the saute function (if electric) or open boil (if stovetop) to reach gel point. This is genuinely faster.
But here's where pragmatism matters: faster doesn't mean careless. Hidden time costs include preheat (15 to 17 minutes on electric models), natural pressure release (10 to 15 minutes), and cool-down, which are rarely listed upfront, so many recipes mislead on actual start to jar duration.[3][4] A truthful timeline matters when you're choosing between a quick batch and meal prep night.
Two Core Approaches: Pectin vs. No-Pectin
Before you start, choose your thickener. This decision cascades through every step.
With Pectin (Faster Set, Predictable Yield)
Using commercial or natural pectin locks gel point at a predictable temperature.[1] You combine fruit, pectin, lemon juice, and sugar, pressure cook for 1 to 3 minutes (depending on fruit), then finish on high heat until the mixture reaches 220°F (or passes the cold-spoon test).[1][4]
Trade-offs: Pectin costs money, adds a recurring ingredient to your shopping list, and some cooks prefer the "pure fruit" aesthetic of no-pectin jam. If you're making jam once a year, pectin feels wasteful. If you're doing 5 to 6 batches in season, the cost amortizes and you reclaim consistency.
Without Pectin (Lower Input Costs, Variable Results)
Honey or sugar alone can thicken jam if you boil it long enough and your fruit choice cooperates.[6] Berries and stone fruits work; watery fruits (like melon) often don't without supplemental thickener or extended boiling.
Trade-offs: No added cost per batch, but extended boiling time (15 to 20 minutes on saute) means more electricity, more stirring, and higher risk of scorching on the bottom.[3][5][6] You're also betting that your fruit-to-sugar ratio was correct, and if it wasn't, you're left eating jam that's either too thin or too sweet.
Value beats novelty: a jar of perfectly set jam from a predictable method beats the gamble of a no-pectin batch you'll need to rebake.
Pressure Cooking Methods: What the Data Shows
Three techniques emerged across tested recipes. Here's how they compare: For model recommendations tested for preserves, see our best pressure cookers for jam making.
| Method | Pressure Time | Release Type | Thickening Finish | Total Time (incl. preheat & cool) | Best For |
|---|---|---|---|---|---|
| Quick high-pressure cook | 1 to 2 min | Natural (10 to 15 min) | Saute 15 to 20 min | ~50 min | Pectin recipes; time-pressed |
| Standard high-pressure cook | 2 to 4 min | Natural (10 to 15 min) | Saute 10 to 15 min | ~55 min | No-pectin; thicker batches |
| Honey-based low-pressure (stovetop) | 2 min | Natural (full depressure) | Open boil 15+ min | ~60 min | Minimal ingredients; allergies |
Electric models (Instant Pot, etc.) preheat longer but offer precision. Stovetop cookers reach pressure faster but require more babysitting during finish.
The Checklist: What Actually Works
Vague recipes fail. Clear checklists succeed. Here's the non-negotiable sequence for any batch:
Pre-Cook (30 minutes before pressure)
- Sterilize jars by boiling for 10 minutes; do not skip this step[1]
- Have lids ready (new or recently used; old lids often fail)
- Measure fruit, sugar, and any acid (lemon juice) by weight, not volume
- Set two metal spoons in the freezer for the gel test
In-Pot (pressure phase)
- Combine fruit, sugar, and acid; stir
- If using pectin, add it now and stir until dissolved
- Pressure cook on high for 1 to 4 minutes depending on recipe and fruit type (1 min for berries, 3 to 4 for firm stone fruits)[3][4][5]
- Do not open the lid early
Natural Release (10 to 15 minutes)
- Allow pressure to drop naturally; this phase continues cooking gently and prevents sputtering
- Do not use quick release; the temperature swing can cause foaming or uneven set[3]
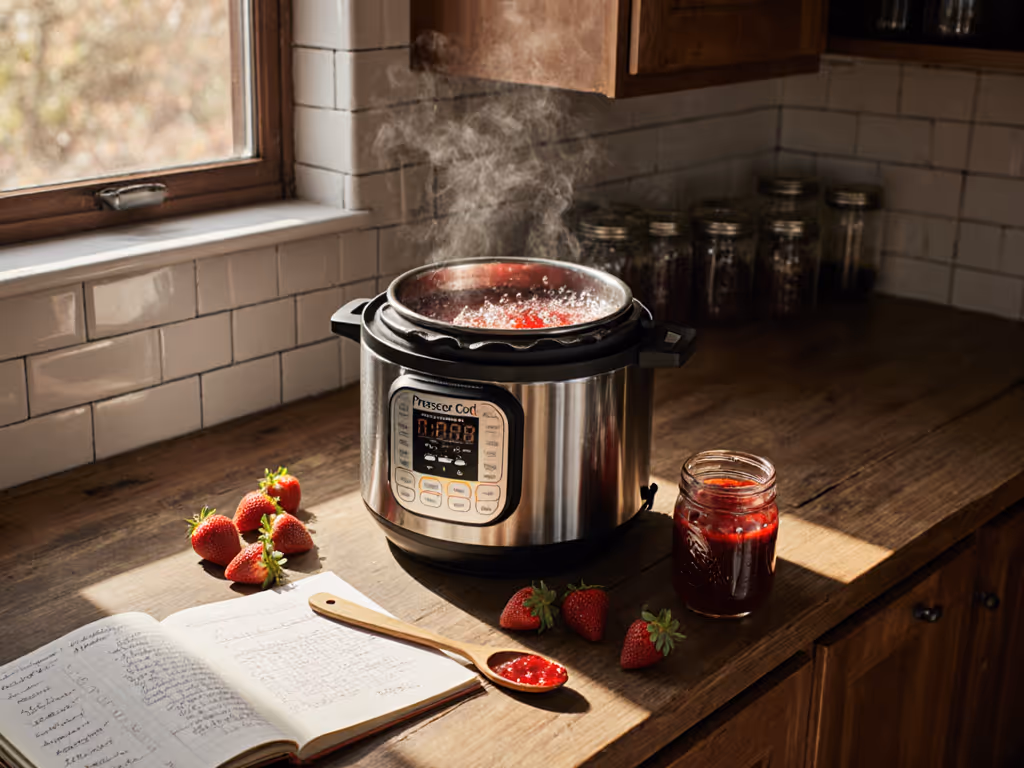
Thickening Finish (15 to 20 minutes)
- Press saute (electric) or turn heat to high (stovetop)
- Bring to a rolling boil; stir frequently to prevent scorching
- Test gel every 2 minutes: dip a cold spoon into jam, pull it out, and observe. If the jam sheets off (hangs from the spoon as one mass), it's set; if it drips, keep boiling[7]
- Once set, turn off heat immediately For safe long-term storage (beyond simple jar sealing), review our pressure canning safety guide.
Jarring & Cooling (24 hours)
- While jam is still hot, use a funnel to fill jars, leaving 1 inch headspace[1]
- Tap the sides to release air bubbles[1]
- Wipe rims with white vinegar (removes sugar residue that prevents sealing)[1]
- Screw lids finger-tight only; do not over-tighten[1]
- Let cool undisturbed for 12 to 24 hours
- Press each lid center; if it "pops" down and back up, the seal failed and the jam must be eaten within days, not stored long-term[1]
Three Must-Have Adjustments
Batch Size Variability
Recipes often assume 2 to 4 pounds of fruit. Doubling or halving requires tweaks:
- Pressure time stays the same (pressure doesn't scale)
- Preheat time increases slightly if the pot is fuller
- Finish boiling may shorten for smaller batches (less surface area to evaporate)
Test the first batch and adjust finish time by plus or minus 5 minutes for future batches in the same pot.
Frozen vs. Fresh Fruit
Frozen fruit releases more liquid, so reduce added water by 2 to 3 tablespoons if called for.[7] Pressure time stays the same; thawing isn't necessary.
Altitude Adjustments
Above 2,000 feet, increase pressure time by 5% for every 1,000 feet. For elevation-specific tables and examples, use our high-altitude pressure cooking guide. This is rarely mentioned but matters if your altitude is high; underpressurized jam won't set properly.[8]
The Real Cost Math
Pressure cooker jam looks cheap on the surface. Here's what actually adds up:
- Per-jar ingredient cost: about $1.50 to $2.50 (fruit + sugar + acid)
- Electricity: about $0.30 to $0.50 per batch (preheat + pressure + finish boil)
- Jar reuse cost: $0.10 to $0.20 per jar if buying new; $0 if reusing
- Pectin (if used): $0.15 to $0.25 per batch
- Total per jar (assuming 5 to 6 jars per batch): $0.35 to $0.55
Store-bought jam runs $3 to $6 per jar. Homemade pressure cooker jam costs one-tenth as much and tastes fresher. But only if the batch actually sets and gets eaten. A jar that's too thin or too sweet becomes a storage monument.
When to Skip the Pressure Cooker
Pressure cooking jam isn't always the win:
- One-time batches: The preheat time (15 to 17 minutes) is wasted if you're never doing this again
- Jam jellies or strains: Straining fruit through cheesecloth before pressure cooking is an extra step that negates speed gains
- Experimental recipes: Small batches (under 1 pound fruit) don't justify the setup; stovetop wins
For repeat seasonal cooks (cherry season, berry season, apple-butter fall), pressure cooker jam saves time and electricity month after month.
Your Next Step: One Small Batch First
Pick one fruit, one recipe, and one pectin or no-pectin choice. Use the checklist above exactly. Document your actual start to finish time, gel results, and whether the flavor held (or soured during the long finish boil).
Once one batch succeeds, you've proven the method works in your kitchen with your equipment. That confidence beats any hype. From there, you can scale with predictability.
Value shows up in leftovers, not launch day hype, and a predictable batch of homemade jam that you'll actually eat beats a fancy canning method that fails and leaves you buying store jars anyway.
Related Articles